Switch
Switch Input - Switch NORMAL CLIMATE
Introduction
Any switch module can be used as an digital input. In everyday language the switch is often referred to as a “button”. You may use it by simply connect it to either a GPIO that is normally high (pull-up) or normally low (pull-down). Other types of switches are door switches (reed switch), sound activated switches and pulse activated switches.
- Specifications:
Give a high or low signal to a GPIO
Power needed: 3.3V (typically)
Output voltage: same as input (typically)
Wiring
ESP               Switch/button
GPIO (X)   <-->   Signal

Power
3.3V       <-->   Signal
            or
GND        <-->   Signal
Setup
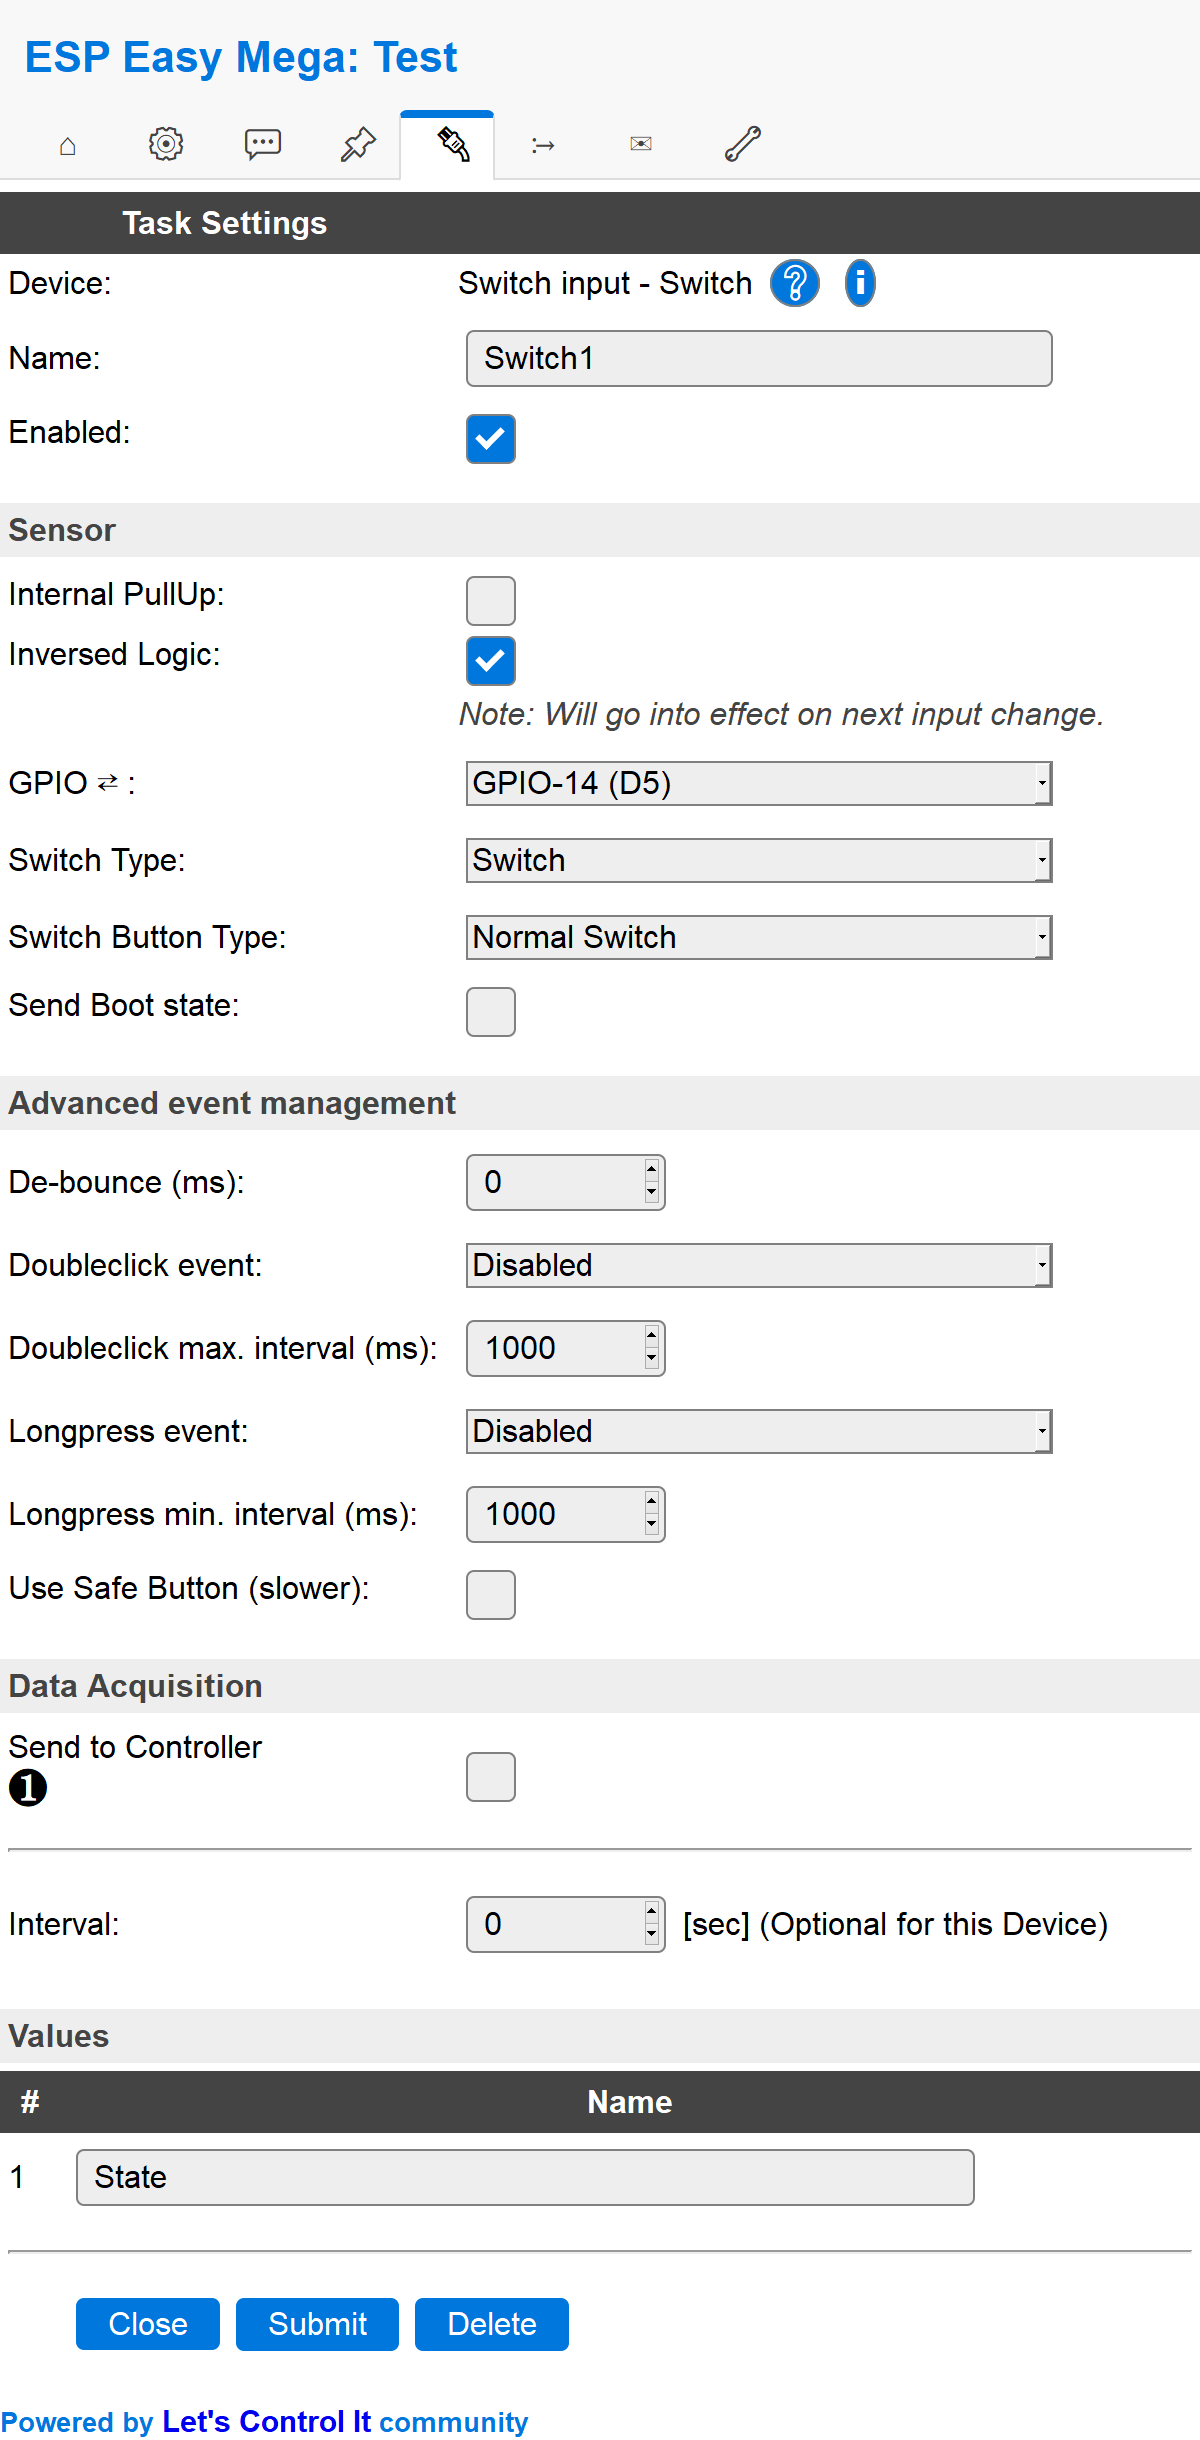
Task settings
Device: Name of plugin
Name: Name of the task (recommended name SwitchN, where N is a number)
Enable: Should the task be enabled or not
Sensor
Internal pull-up: Check if you want to use the internal pull-up of the ESP (not all GPIO pins have this internal pull-up.)
Inverse logic: Sometimes you may want the physical high value to be published as a low value. For example if the button is triggering a high (1) value when you push it you maybe use it to turn of a LED so the
Switch#Statewould then logically be preferred to be set as 0 and thus used as a variable for controlling that LED. See rules example below.GPIO: Which GPIO should be used, recommended to not use a latching switch that may set the ESP into flash mode if left to high/low.
Switch type: Set the switch type to either “Switch” or “Dimmer”. Dimmer is used if you have a knob that can be turned and thus give multiple switch trigger signals.
Switch: The default way of handling a switch is by a on/off button. It’s either on (
1) or off (0).Dimmer: If you use the dimmer option you will be able to control the device using a dimmer (knob that can be turned). The value allowed for dimmers are
0..255and a new setting is added to the web form (Dim value).
Switch button type: Set the type of switch, “Normal switch”, “Push button active low”, or “Push button active high”. * Normal switch: If you use a normal switch you should use this (you can always start with this setting).
Push button active low: If you use a momentary switch you may want the state to be activated when you have it published and not wait for it to be released. Depending on your setup you can then experiment with the active low / active high to make it behave as you want.
Push button active high: See bullet point above.
Send boot state: If checked the unit will publish the switch state when booting. If not checked you may find yourself with a latching switch caught in limbo. This means that the unit is registering a low/high value but the physical state of the switch might be the opposite. If you use a mechanical switch that may be physically set to a state you should check this option.
Advanced event management
De-bounce (ms): How long should the pulse (the time you press the button) be, if set to high you need to have it published for a longer time before the unit will register it as an state change. You could experiment with this setting to find a good behavior of the button if you feel that it’s not responding according to your preferences.
Double click event: If enabled the unit will detect double clicks which are within the set interval (see below). The double click event is identified as
Switch#State=3. There’s three options for the double click: * Active only on low: the double clicks will be counted by how many low signals that is triggered within the set time. * Active only on high: the double clicks will be counted by how many high signals that is triggered within the set time.Active on high & low: the double clicks will be counted by how many high and low signals that is triggered within the set time. This means that a double click could be registered as a press and release of a button. So not actually double click.
Double click max interval (ms): This is the interval that you need to perform the double click within.
Long press event: If enabled the unit will detect a long press of a button. There’s three different behaviors of the long press:
Active only on low: this means that the unit will only be triggering the long press event if the signal is low. Two different event values are used,
10if the state goes from 0 to 1 (Switch#State=10), and11if the state goes from 1 to 0 (Switch#State=11).Active only on high: same as above but only triggered on high signal.
Active on high & low: the long press will be triggered both on high and low signals.
Long press min interval (ms): This is the interval that you need to press the button before the long press event is triggered.
Use safe button (slower):
Data acquisition
Send to controller 1..3: Check which controller (if any) you want to publish to. All or no controller can be used.
Interval: How often should the task publish its value (optional for switch plugins).
Indicators/values (recommended settings)
Indicator |
Value Name |
Interval |
Decimals |
Extra information |
|---|---|---|---|---|
State |
State |
0 |
N/A |
Usually you just want the state being published when an actual push has been happening. If you want a continuous publishing of the state you may use the interval setting to do so. |
Rules examples
on Switch#State do
 if %eventvalue1%=3
  //double click triggered!
  GPIO,12,0
 else
  GPIO,2,%eventvalue1%
  GPIO,12,1
 endif
endon
Note
Events may be handled from an event queue, so by the time the event is being handled, the state of the switch can already be different.
Therefore it is best to use the state of the switch at the time the event was generated,using %eventvalue1% .
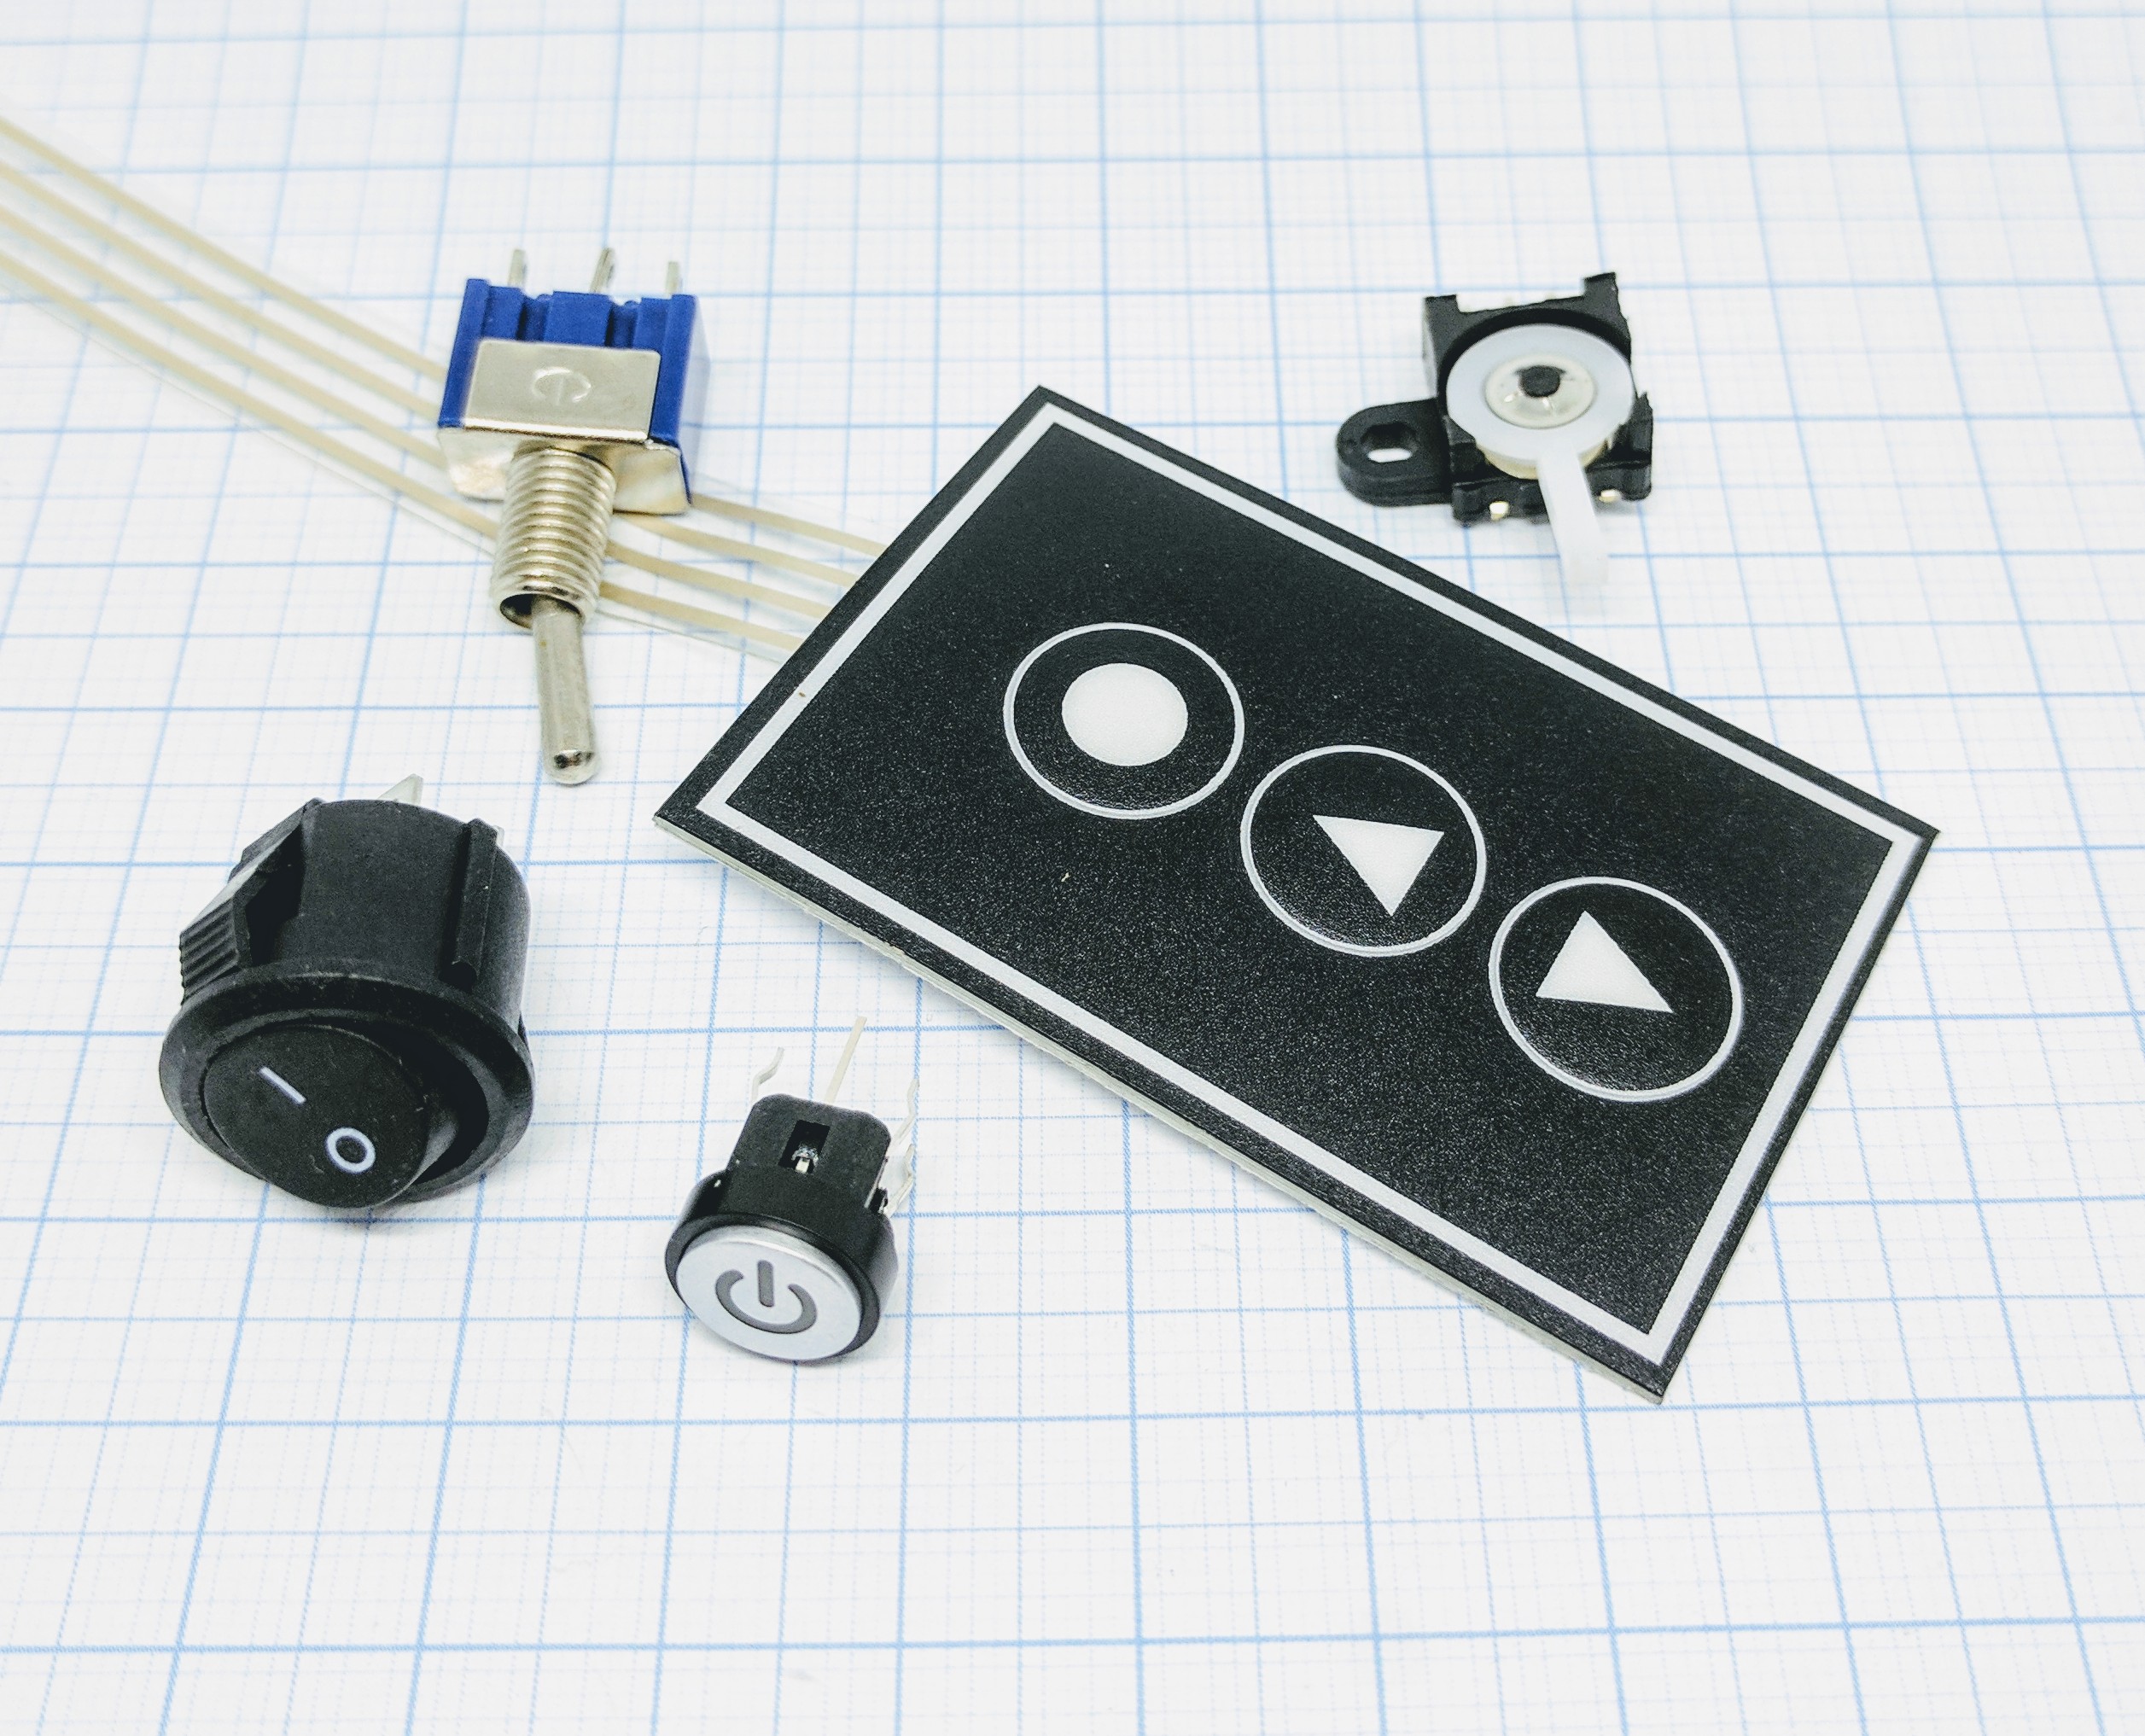
Where to buy
Store |
Link |
|---|---|
Toggle switch |
|
Float switch |
|
Membrane switch |
|
Capacitive (touch) switch |
AliExpress 4 ($) Banggood 7 ($) Banggood 8 ($) Banggood 9 ($) eBay 4 ($) |
Limit switch |
|
Momentary switch |
AliExpress 6 ($) Banggood 12 ($) Banggood 13 ($) Banggood 14 ($) eBay 6 ($) |
$ = affiliate links which will give us some money to keep this project running, thank you for using those.