Door switch
Switch Input - Switch NORMAL CLIMATE
Introduction
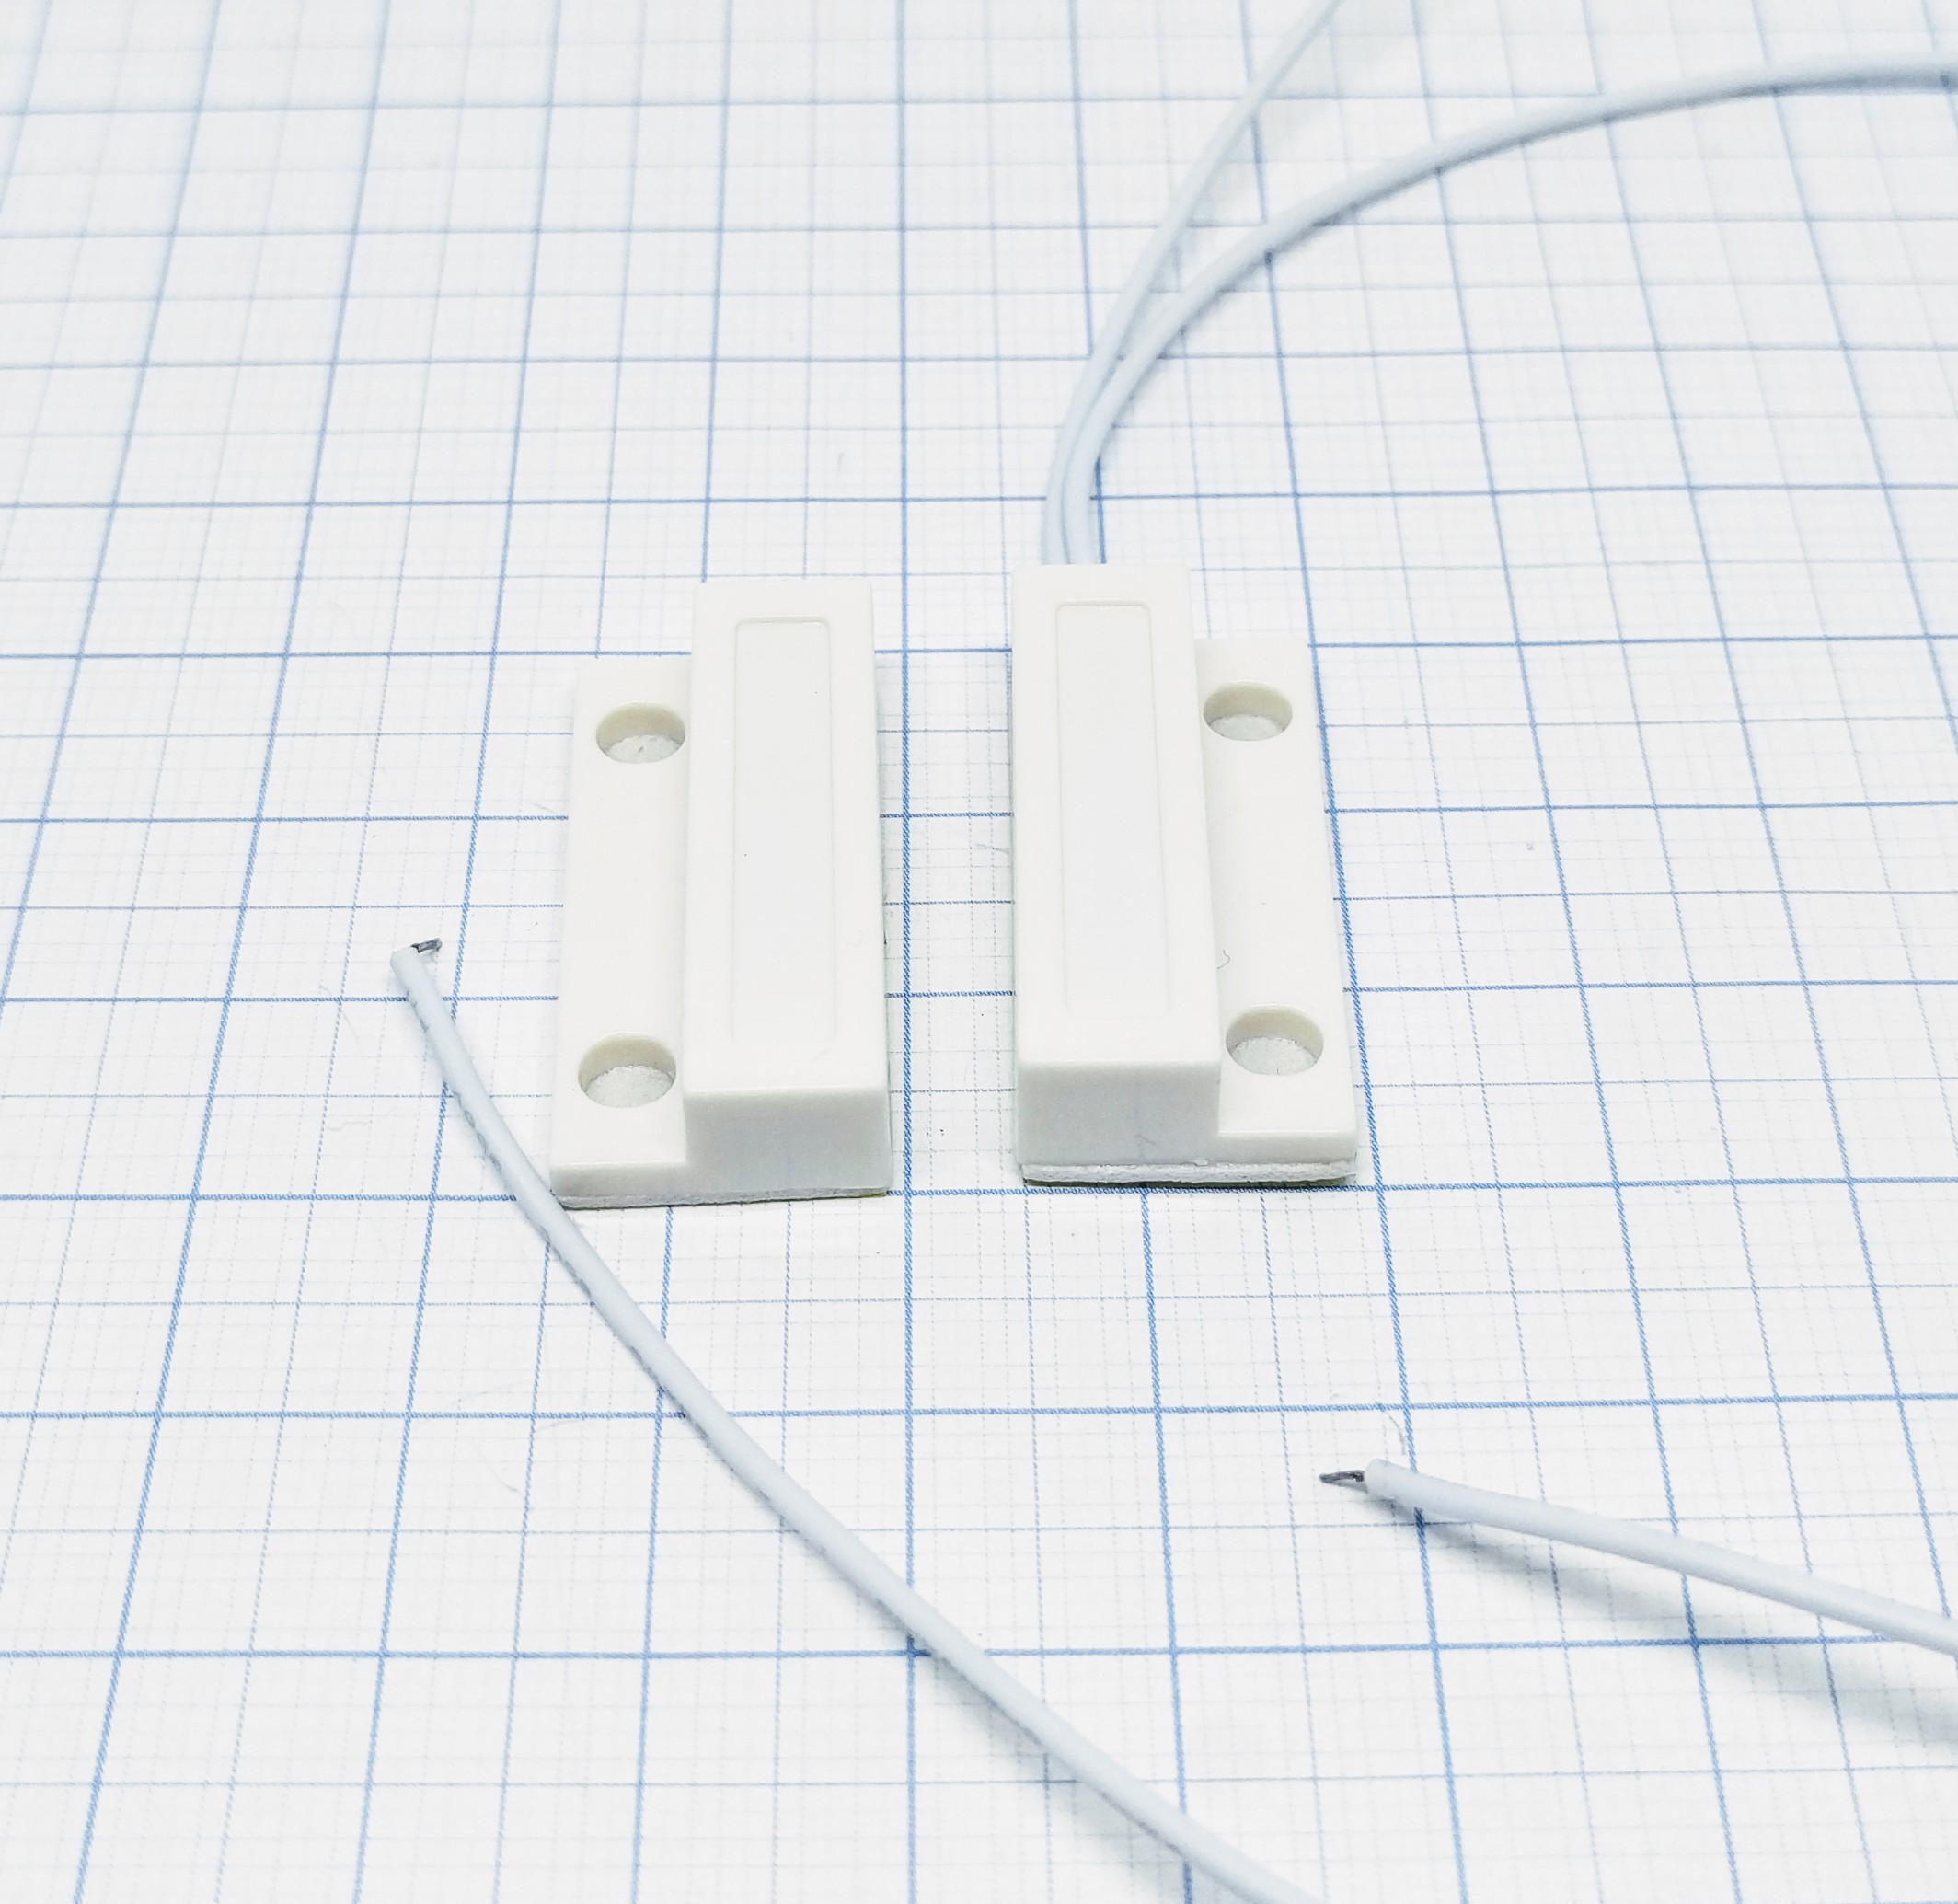
Any door switch module can be used as an digital input. Most none contact door switches use a technology called reed switch. By using a magnet (the part with no wires) the reed inside the other part (with wires) will connect the two parts of the reed and making a signal go low or high depending on how you have connected the switch. You may use it by simply connect it to either a GPIO that is normally high (pull-up) or normally low (pull-down).
- Specifications:
Give a high or low signal to a GPIO
Power needed: 3.3V (typically)
Output voltage: same as input (typically)
Wiring
ESP               Door switch
GPIO (X)   <-->   Signal

Power
3.3V       <-->   Signal
            or
GND        <-->   Signal
Setup
Task settings
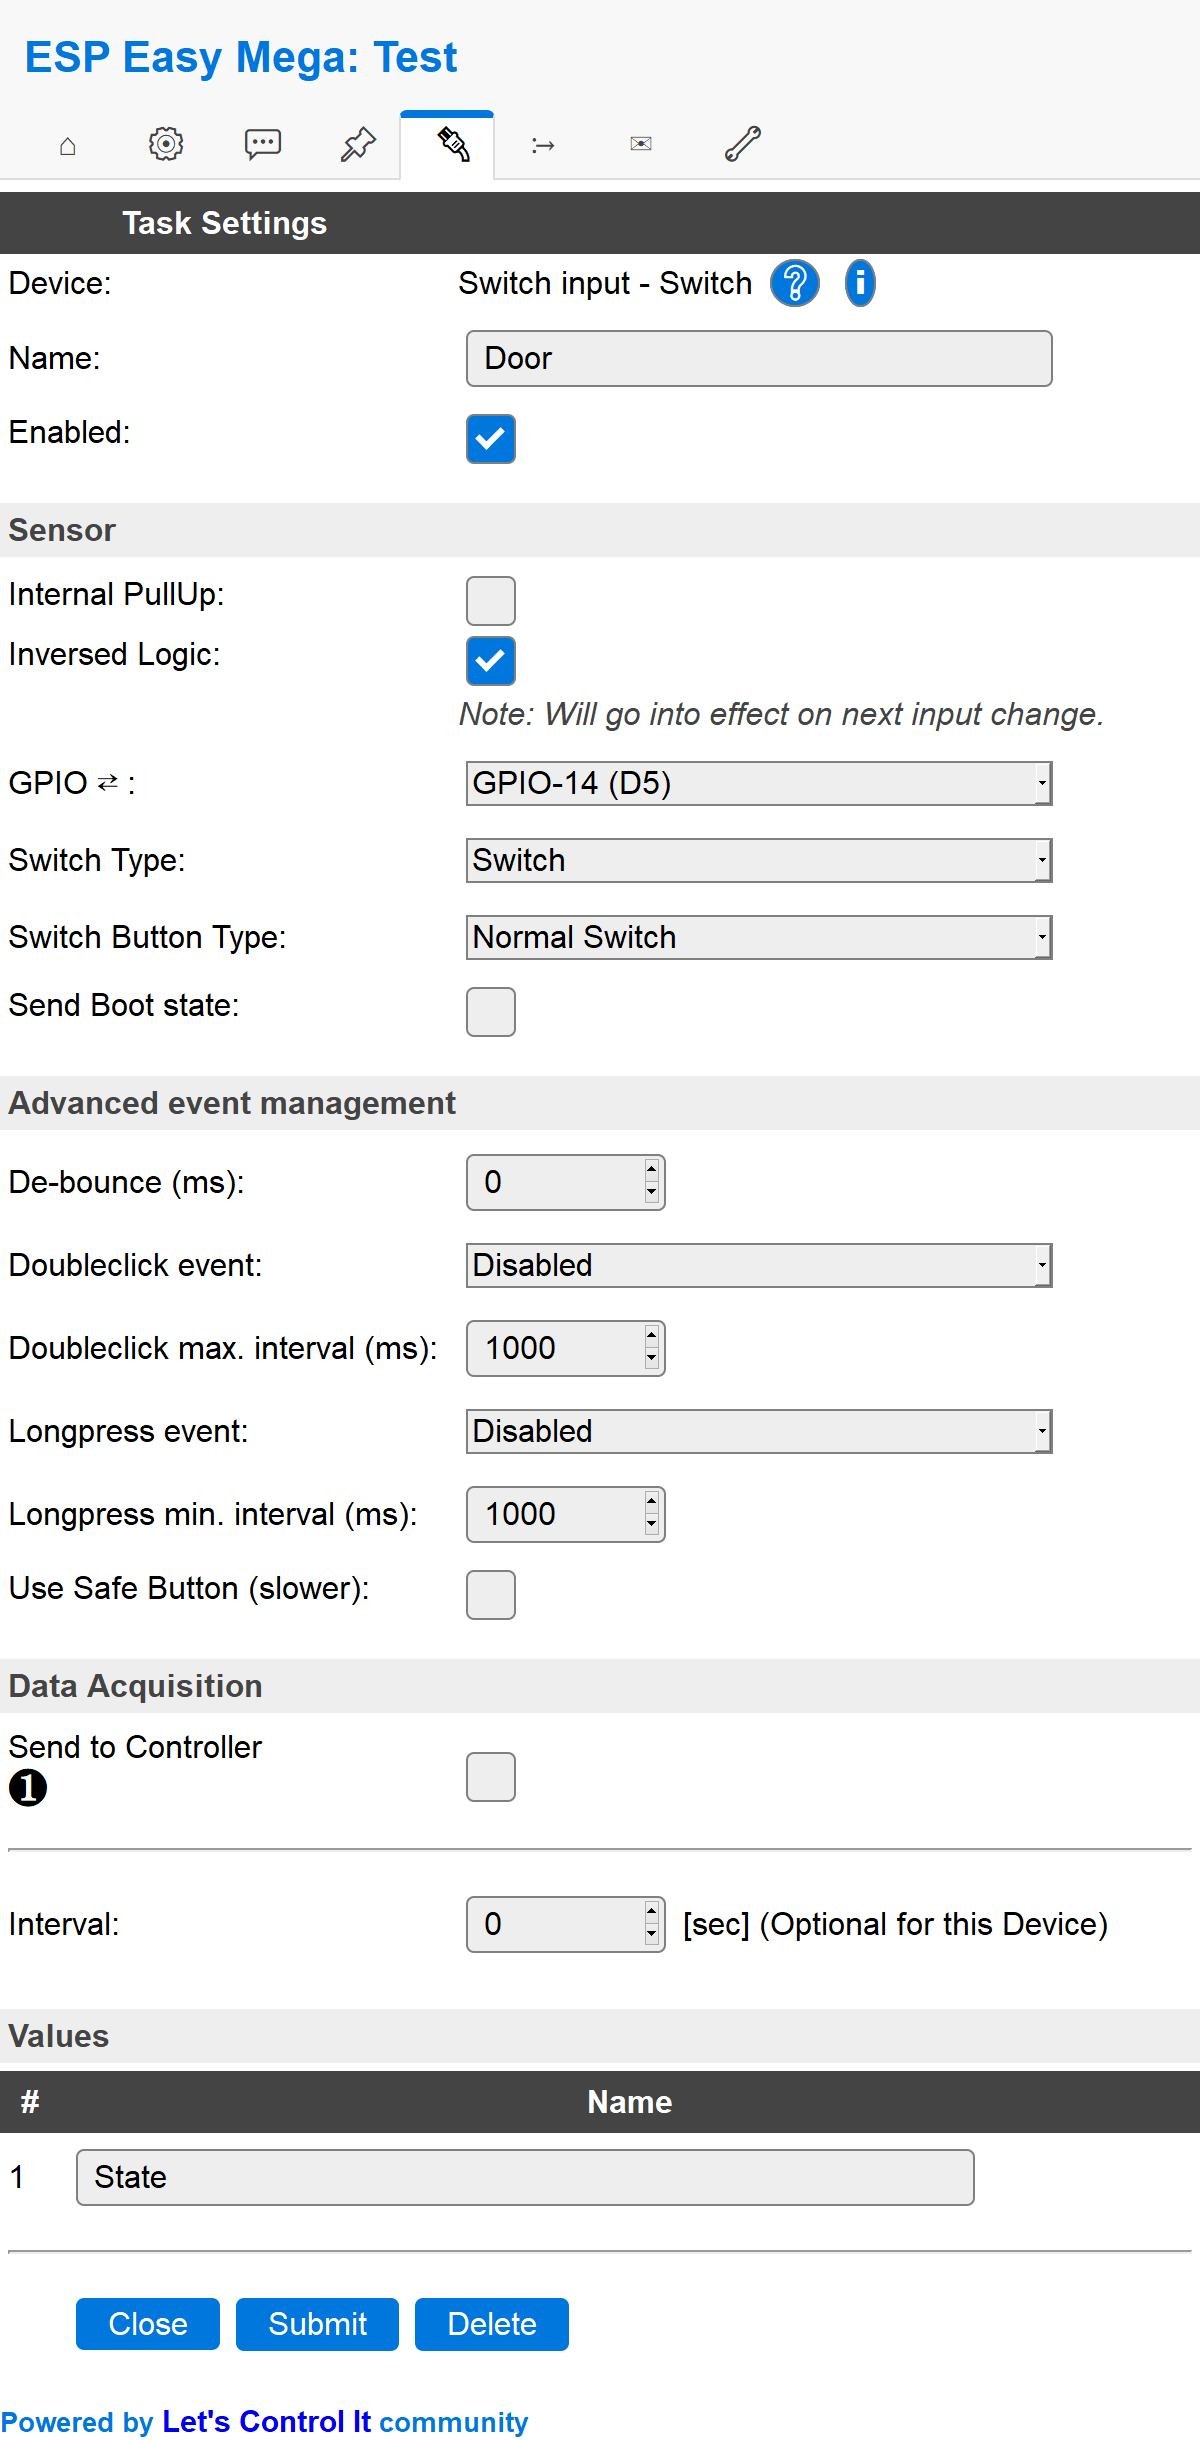
Device: Name of plugin
Name: Name of the task (example name Door)
Enable: Should the task be enabled or not
Sensor
Internal pull-up: Check if you want to use the internal pull-up of the ESP (not all GPIO pins have this internal pull-up.)
Inverse logic: Sometimes you may want the physical high value to be published as a low value. For example if the button is triggering a high (1) value when you push it you maybe use it to turn of a LED so the
Switch#Statewould then logically be preferred to be set as 0 and thus used as a variable for controlling that LED. See rules example below.GPIO: Which GPIO should be used, recommended to not use a latching switch that may set the ESP into flash mode if left to high/low.
Switch type: Set the switch type to either “Switch” or “Dimmer”. Door (reed) switch is a “Switch”.
Switch: The default way of handling a switch is by a on/off button. It’s either on (
1) or off (0).Dimmer: Not used by door (reed) switches, if you still want to use it you can have a look at the Switch page.
Switch button type: Set the type of switch, “Normal switch”, “Push button active low”, or “Push button active high”. * Normal switch: This is the general setting to use for a PIR switch.
Push button active low: Not used by door (reed) switches (in general), if you still want to use it you can have a look at the Switch page.
Send boot state: If checked the unit will publish the switch state when booting. If not checked you may find yourself with a latching switch caught in limbo. This means that the unit is registering a low/high value but the physical state of the switch might be the opposite. If you use a mechanical switch that may be physically set to a state you should check this option.
Advanced event management
De-bounce (ms): How long should the pulse (the time you press the button) be, if set to high you need to have it published for a longer time before the unit will register it as an state change. You could experiment with this setting to find a good behavior of the button if you feel that it’s not responding according to your preferences.
Double click event: Not used by door (reed) switches (in general), if you still want to use it you can have a look at the Switch page.
Double click max interval (ms): Same as above..
Long press event: Same as above..
Long press min interval (ms): Same as above..
Use safe button (slower): Same as above..
Data acquisition
Send to controller 1..3: Check which controller (if any) you want to publish to. All or no controller can be used.
Interval: How often should the task publish its value (optional for switch plugins).
Indicators/values (recommended settings)
Indicator |
Value Name |
Interval |
Decimals |
Extra information |
|---|---|---|---|---|
State |
State |
0 |
N/A |
Usually you just want the state being published when door is actually being opened/closed. If you want a continuous publishing of the state you may use the interval setting to do so. |
Rules examples
on Door#State=1 do
  timerSet,1,1
endon

on rules#timer=1 do
 if [Door#State]=0
  //Action if door is closed
 else
  //Action if door is opened
 endif
endon
Where to buy
Type |
Link |
|---|---|
Door switch |
|
Reed switch |
$ = affiliate links which will give us some money to keep this project running, thank you for using those.