Energy (Heat) - Mitsubishi Heat Pump
Should support all Mitsubishi heatpump units with a CN105 connector
Plugin details
Type: Energy (Heat)
Name: Mitsubishi Heat Pump
Status ESP32: COLLECTION D ENERGY
Status ESP8266: COLLECTION D ENERGY
GitHub: P093_MitsubishiHP.ino
Maintainer: crnjan
Used libraries: .
Plugin is based on Arduino library to control Mitsubishi Heat Pumps.
Supported hardware
Plugin should support all Mitsubishi heat pump units with a CN105 connector- git issue, where users can report models they are using - list.
How to connect
Note: If your unit has cn105 port, it is most likely supported. If your unit has cn100 port, it may work as well.
CN105 |
CN100 |
Notes |
|---|---|---|
1 |
NA |
12V, can be sourced from pin 3 of cn51 or pin 1 of cn52 (not needed for ESP) |
2 |
8 |
GND |
3 |
1 |
5V |
4 |
5 |
TX |
5 |
4 |
RX |
Danger
Please make sure to verify voltages!
Parts required to make a CN105 female connector
Example using D1 mini PRO
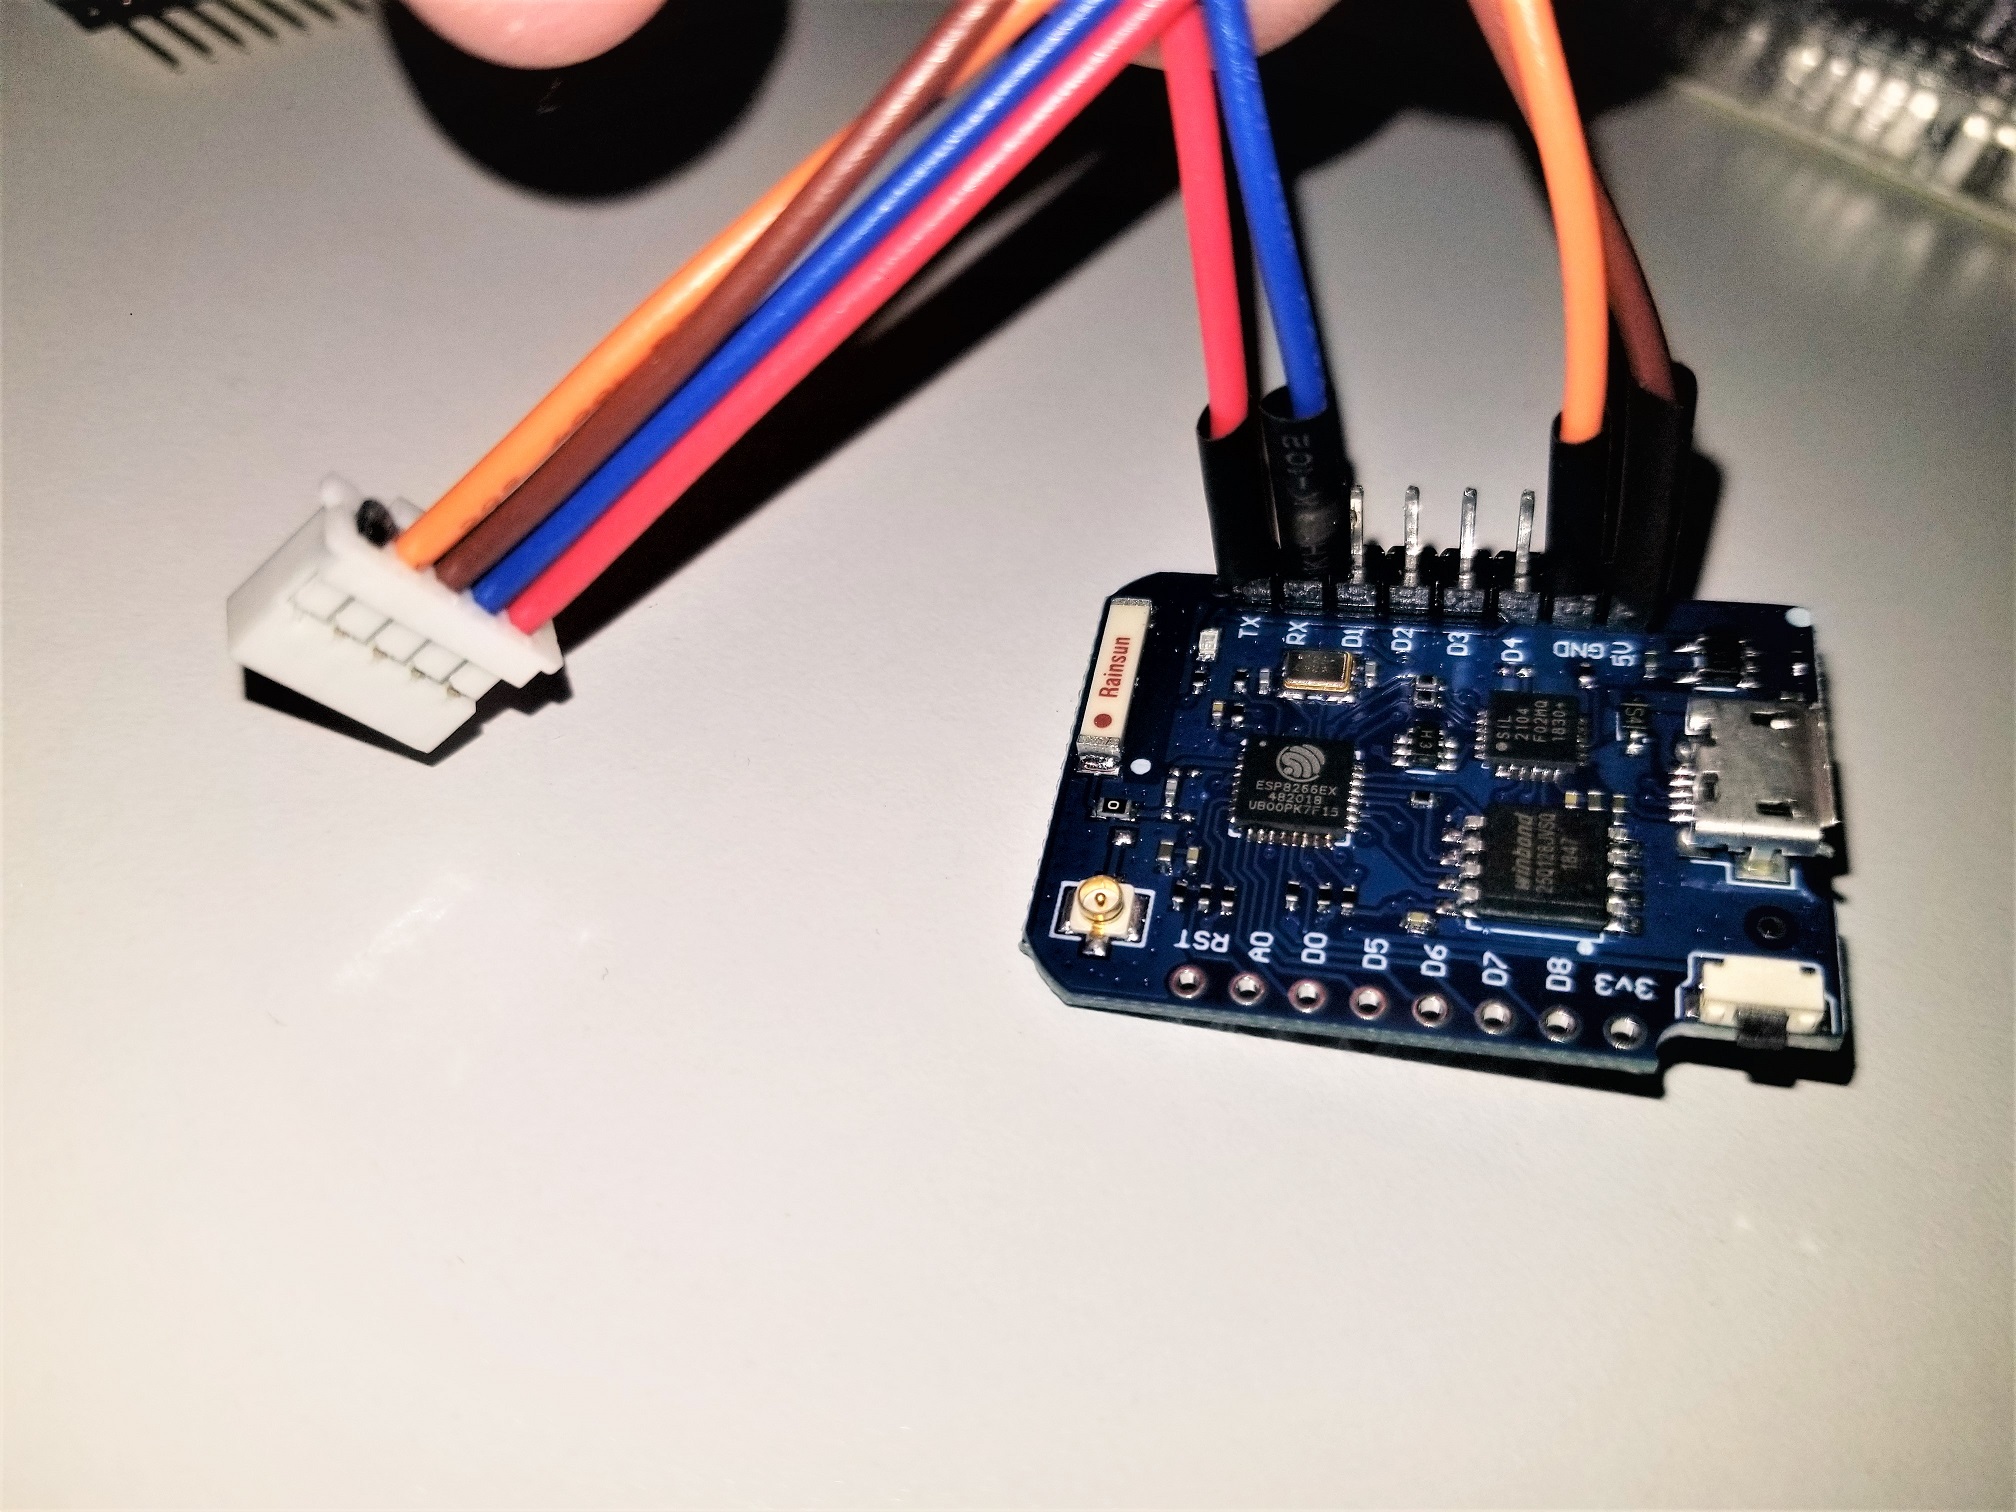
There is a good tutorial on how to do soldering and installing.
Setup
The Mitsubishi Heatpump plugin can be added as simple as selecting it from the list, selecting the serial port used for connection - and we are ready:
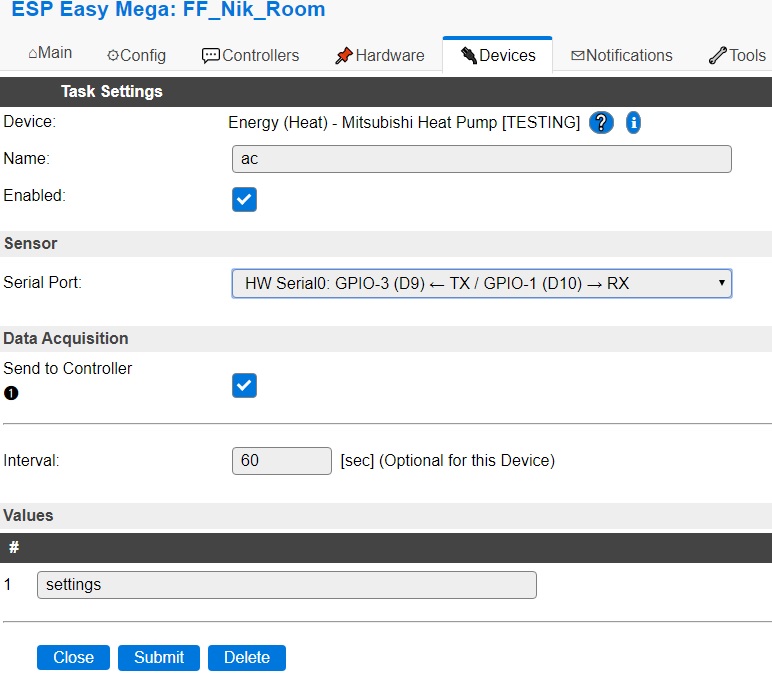
See: Serial Helper configuration
Once we hit submit, the plugin will start sending messages through controller, i.e. MQTT with payload:
{"roomTemperature":19.5,"wideVane":"|","power":"OFF","mode":"HEAT","fan":"AUTO","vane":"AUTO","iSee":false,"operating":false,"compressorFrequency":2,"temperature":22.0,"remoteTemperature":19.5}
Message is send every time a change is detected (i.e. one changes settings using IR remote control) and every X seconds, as set in the settings (60 seconds in above screenshot).
Commands
Command |
Description |
|---|---|
|
Value must be between |
|
Value = |
|
Value = |
|
Value = |
|
Value = |
|
Value = |
|
Value > |
Example
There are several ways how to control AC unit using ESP Easy.
Using HTTP:
Generally commands are send via http using syntax http://<espeasyip>/control?cmd=<command> where <espeasyip> is the IP of your ESP Easy device, for example 192.168.0.100:
Command |
Description |
|---|---|
|
Turn on AC |
|
Set target temperature to 23 |
|
Set fan mode to |
Using MQTT:
Commands are send via MQTT using syntax <MQTT subscribe template>/cmd with payload: <command>. For example, if your unit name is MyESPEasy, one would send the below payload to topic MyESPEasy/cmd:
Payload |
Description |
|---|---|
|
Turn on AC |
|
Set target temperature to 23 |
|
Set fan mode to |
Please check here for more details on how to send commands using ESP Easy.
Please check for an example integration with openHAB.
Get Config Values
Get Config Values retrieves values or settings from the sensor or plugin, and can be used in Rules, Display plugins, Formula’s etc. The square brackets are part of the variable. Replace <taskname> by the Name of the task.
Config value |
Information |
|---|---|
[<taskname>#roomTemperature] |
Value as received from the connected device, includes 1 decimal.
When Remote Temperature is used, received value is rounded to the nearest 0.5 C.
|
[<taskname>#wideVane] |
Value as received from the connected device.
|
[<taskname>#power] |
Value as received from the connected device.
|
[<taskname>#mode] |
Value as received from the connected device.
|
[<taskname>#fan] |
Value as received from the connected device.
|
[<taskname>#vane] |
Value as received from the connected device.
|
[<taskname>#iSee] |
Value as received from the connected device, 1 = on/enabled, 0 = off/disabled.
|
[<taskname>#temperature] |
Value as received from the connected device, includes 1 decimal.
|
[<taskname>#operating] |
Value as received from the connected device, when
Include AC status is enabled, 1 = on, 0 = off. |
[<taskname>#compressorFrequency] |
Value as received from the connected device, when
Include AC status is enabled. |
[<taskname>#remoteTemperature] |
Value as received from the connected device, includes 1 decimal.
|
Special thanks
to SwiCago and other maintainers and contributors of the Arduino library to control Mitsubishi Heat Pumps from https://github.com/SwiCago/HeatPump/,
to Chris Davis for his great blog,
to Hadley from New Zealand for his hacking.
and all others that contributed on this subject.
Change log
Changed in version 2023/09/25: …
added Set Remote Temperature. (value > 0: Use external temperature sensor, value = 0: Use internal temperature sensor)
Changed in version 2021/08/03: …
added Status of operating and compressor frequency.
Added in version 2020/03/07: …
added Initial release version.