Display - HT16K33
.
Plugin details
Type: Display
Name: HT16K33
Status ESP32: DISPLAY COLLECTION
Status ESP8266: DISPLAY COLLECTION
GitHub: P057_HT16K33_LED.ino
Maintainer: .
Used libraries: .
Supported hardware
.
Introduction
The HT16K33 16 port generic I/O chip can be configured to act as a LED driver or as a maxtrix-keyboard input. This plugin describes settings for it to be used as a LED / 7-segment display driver.
Configuration
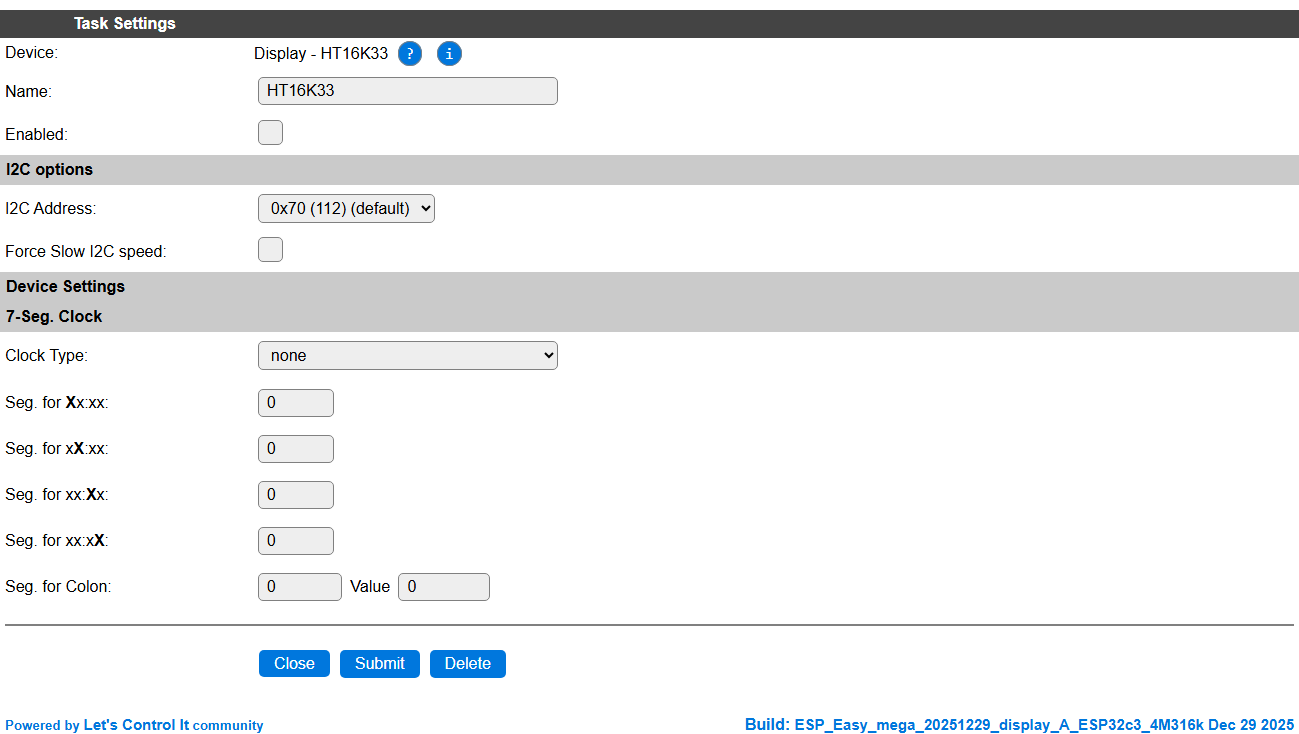
Task settings
Name The name of the task. This should be unique for all devices that are configured. (Initially empty)
Enabled For the device to work it has to be enabled. When checked, the device will be started as soon as the ESP starts. If desired, the device can also be enabled from f.e. a rule by using the
TaskEnable,<tasknr>orTaskEnable,<taskname>command, or disabled using the correspondingTaskDisable,<tasknr>|<taskname>commands.
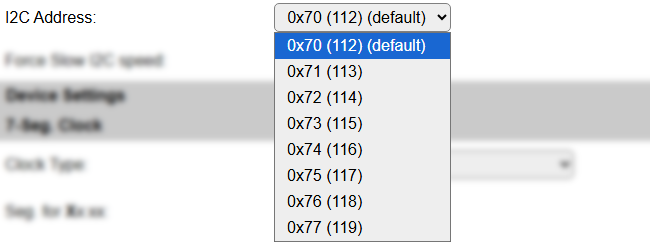
I2C options
I2C Address: Select the address the chip is set for, available options:
The available settings here depend on the build and hardware configuration used. At least the Force Slow I2C speed option is available, but selections for the I2C Multiplexer can also be shown. For details see the I2C Bus page
Device Settings
7-Seg. Clock
Clock Type: Select wether the time should be automatically displayed, in either 24h or 12h format, or
none, so other information can be shown, using the commands below.Seg. for Xx:xx: Choose the segment to be used for the 10-hour digit. Usually 0.
Seg. for xX:xx: Choose the segment to be used for the hour digit. Usually 1.
Seg. for xx:Xx: Choose the segment to be used for the 10-minutes digit. Usually 3 (when a colon is included).
Seg. for xx:xX: Choose the segment to be used for the minutes digit. Usually 4 (when a colon is included).
Seg. for Colon: Choose the segment to be used for the colon sign (if any). usually 2. And the value to be used for lighting up the colon. Usually (also) 2.
Commands available
Command Syntax |
Extra information |
|---|---|
m,<param>[,<param>,<param>...] |
Light up leds on the display, description of params below, all values treated as decimal.
This is a low-level command, giving exact control over what led/segment is lit.
|
mx,<param>[,<param>,<param>...] |
Light up leds on the display, description of params below, all values treated as hexadecimal.
This is a low-level command, giving exact control over what led/segment is lit.
|
mnum,<param>[,<param>,<param>...] |
Light up segments on the display, description of params below, all values to be used as numeric content for a 7-segment display.
|
mprint,<text> |
Light up numeric digits on a 7-segment display. If a colon is configured, and another character would land on that segment, then the colon-segment is skipped, a colon would be shown on the colon segment.
This would be the standard command to display numeric data on the display, when not used in Clock-mode.
|
mbr,<0..255> |
Set the brightness of the display in given range, 0 is off, 255 is max. brightness.
|
<param> |
A
<param> can be one of these:<value> : A numeric (or hexadecimal, without any prefix, for MX command) value, that is displayed starting on segment 0, auto-incrementing the segment for multiple values in a single command.<seg>=<value> : Address an explicit segment with a value.clear : Set all values to 0, turning off all leds/segments.test : Fill the leds/segments with a test-pattern.log : Write the current led-buffer values to the log (INFO level). |
Change log
Changed in version 2.0: …
added 2025-12-29 Documentation added.
Added in version 1.0: …
added Initial release version.